When working with complex CAD designs, achieving perfect geometry often requires more than just drawing exact coordinates from the start. The most efficient AutoCAD professionals understand that precision comes from a combination of accurate directional placement and strategic use of modification tools. The Trim and Extend commands in AutoCAD represent fundamental skills that separate beginners from proficient users, enabling you to work faster while maintaining 100% accuracy in your technical drawings.
This comprehensive guide explores the essential geometry of regular polygons and provides detailed instruction on using the Trim and Extend commands effectively. Whether you’re preparing for certification or looking to enhance your daily workflow, mastering these tools will significantly improve your productivity and drawing precision.
Understanding Regular Polygon Geometry
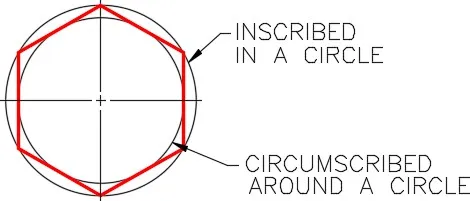
Before diving into modification commands, it’s crucial to understand the geometric foundations that make Trim and Extend so valuable. A regular polygon features equal angles and equal sides, and can be either inscribed within or circumscribed around a circle. While AutoCAD includes automated polygon construction tools, understanding the underlying geometry helps you make informed decisions when constructing complex shapes manually.
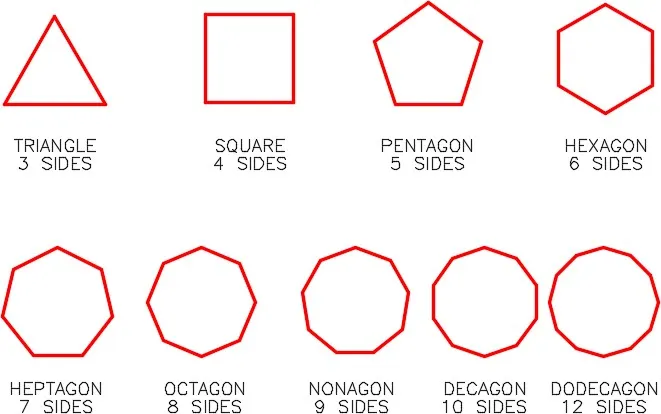
The relationship between circles and regular polygons becomes particularly important when working with construction geometry. As illustrated in the hexagon example, understanding how to construct triangles, squares, hexagons, and octagons using angular relationships forms the foundation for more complex mechanical and architectural drawings.
The Power of Trim and Extend Commands
Not every drawing element can be created using exact coordinates from the outset. Professional drafters frequently use a technique where objects are drawn at approximate lengths but precise directions, then adjusted to exact dimensions using Trim or Extend. This approach doesn’t sacrifice accuracy—it enhances productivity by allowing you to establish correct geometry first, then refine lengths systematically.
Setting Up Trim and Extend in AutoCAD 2021 and Later
AutoCAD 2021 introduced changes to the default behavior of Trim and Extend commands. The default MODE setting of QUICK provides access to cutting edge options, but for predictable results, you’ll want to configure these settings properly:
- Ensure MODE is set to Quick to access all options
- Configure the Edge setting to Extend
- Optionally restore MODE to Standard after configuration
The Critical Selection Order
One of the most common beginner errors involves selecting objects in the wrong order. Always follow this sequence:
- First: Select the cutting edge or boundary objects
- Second: Press Enter or Space to confirm
- Third: Select the objects to trim or extend
This selection order ensures AutoCAD understands which objects serve as references and which need modification.
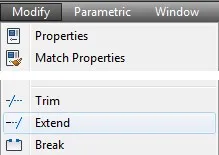
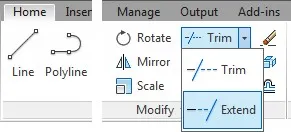
Working with the Trim Command
The Trim command shortens objects to meet the edges of other objects. A powerful feature is that the object being trimmed doesn’t need to physically intersect with the cutting edge—when Edge mode is set to Extend, AutoCAD conceptually extends the cutting edge to meet the object.
Shortcut: TR
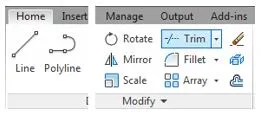 Trim command on Home ribbon
Working with the Extend Command
The Extend command lengthens objects to meet the edges of other objects. Like Trim, objects being extended don’t need to physically intersect with the boundary—the Edge Extend setting allows conceptual extension.
Shortcut: EX
 Extend command on Home ribbon
Practical Application: Step-by-Step Workalong
Let’s apply these concepts through a practical exercise that demonstrates the power of combining construction geometry with Trim and Extend commands.
Setting Up Your Drawing
Start by creating a new drawing using the 2D English template. Create two layers: Object and Construction. Set Construction as the current layer for your initial geometry.
Creating Construction Lines
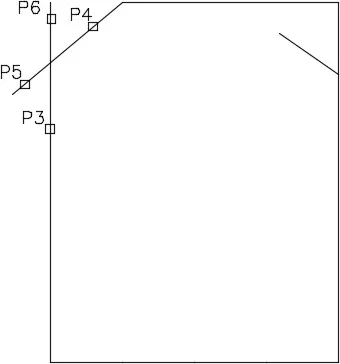
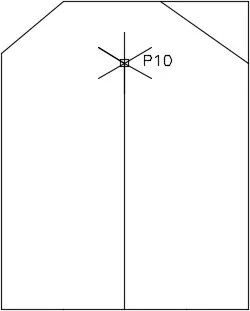
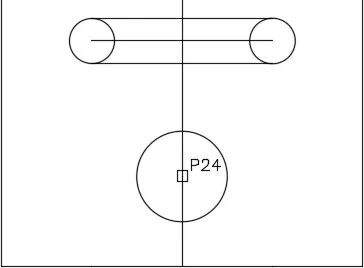
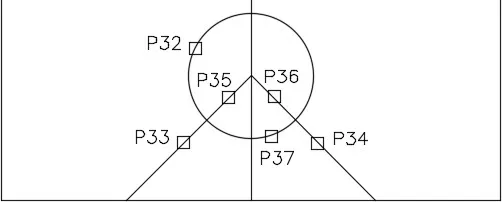
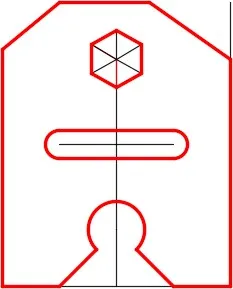
The first step involves drawing construction lines that establish the framework for your object. Rather than drawing from corner to corner, you’ll draw lines between key points, creating endpoints that serve as snap references later.
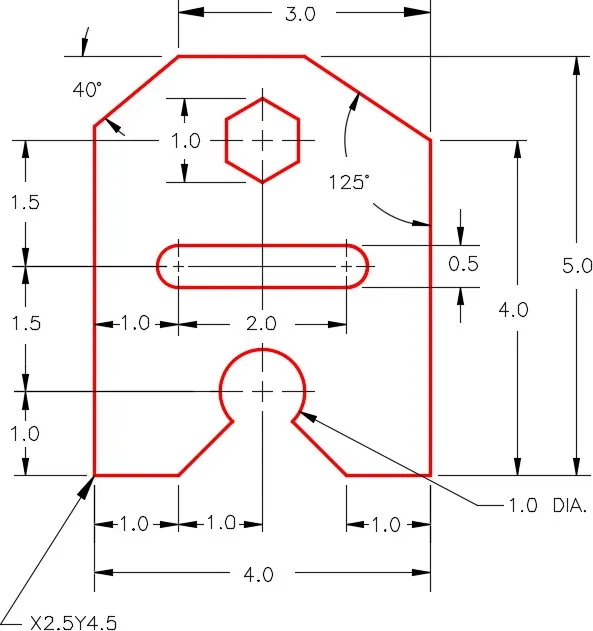
 Complete construction line layout with point labels
Configuring Trim Settings
Before using Trim, configure the Edge option to Extend. This setting enables trimming even when objects don’t physically touch:
Command: TRIM
Current settings: Projection=UCS, Edge=None
Select cutting edges ...
Select objects or <select all>:
Select object to trim or shift-select to extend ...: E
Enter an implied edge extension mode [Extend/No extend] <No extend>: E
Once configured, the Edge setting will persist until changed, streamlining future operations.
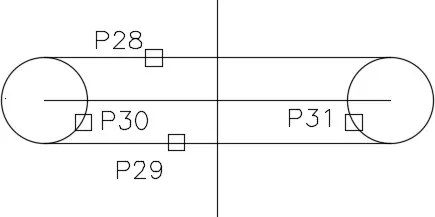
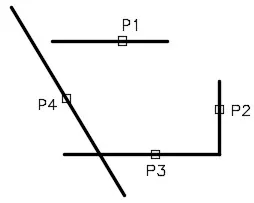
Trimming to Cutting Edges
With settings configured, select your cutting edges first (the objects that define where trimming occurs), then select the objects to trim near the ends to remove:
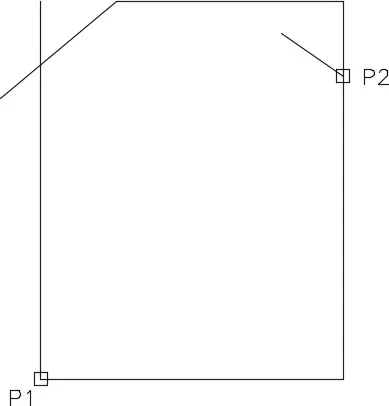
Extending to Boundaries
The Extend command follows the same logic as Trim but lengthens objects instead of shortening them. Select boundary edges first, then select the object near the end to extend:
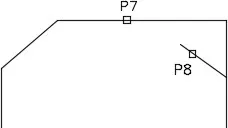 Extend operation before and after showing line extension
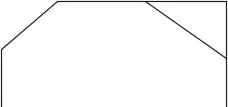 Extended result showing line reaching boundary
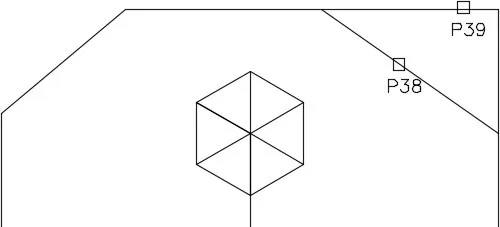
Building Complex Geometry
One powerful technique involves drawing multiple connected construction lines rather than single long lines. This creates endpoints that can be snapped to later, making it easier to construct complex shapes like hexagons:
 Three vertical construction lines drawn end-to-end
From these endpoints, you can draw radial lines at precise angles to establish hexagon vertices:
 Hexagon construction lines radiating from center point
Then connect the endpoints to form the complete hexagon shape:
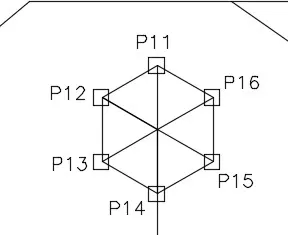 Completed hexagon connecting radial line endpoints
Creating Slots and Arcs
When creating slots, using circles and trimming them to create arcs is often more efficient than drawing arcs directly:
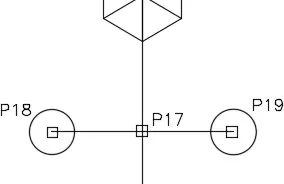 Slot construction showing circles and connecting lines
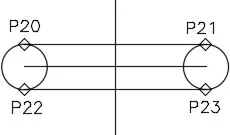 Completed slot geometry before trimming
Similarly, creating full circles then trimming them to arcs simplifies complex curved geometry:
 Circle with intersecting lines for arc creation
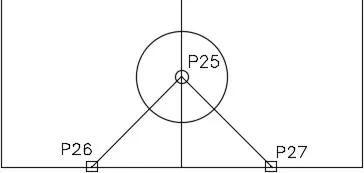 Arc created by trimming circle
Trimming Complex Shapes
Multiple trim operations may be needed to achieve final geometry. Start by trimming slots:
 Slot trim operation selecting cutting edges
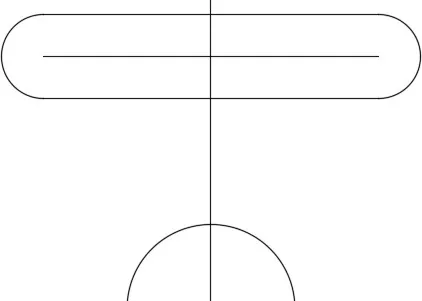 Completed slot after trim
Then trim arcs from circles:
 Arc trim operation showing cutting edges
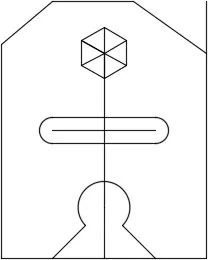 Completed arc after trim
Finally, trim any remaining construction lines:
 Trimming line at top right corner
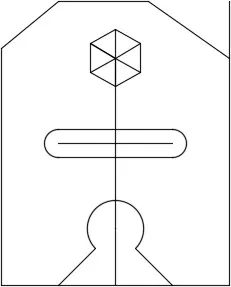 Completed line trim result
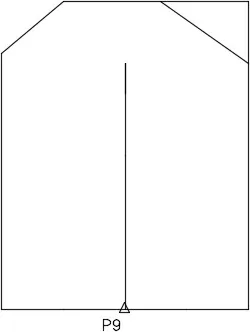
Finalizing the Drawing
After completing all modifications, change the desired objects to the Object layer and freeze the Construction layer to reveal your finished drawing:
 Objects moved to Object layer before freezing construction layer
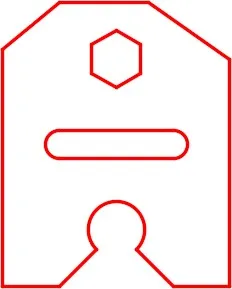 Completed final drawing with construction layer frozen
Advanced Tips: Interchanging Trim and Extend
One of the most powerful time-saving features is the ability to switch between Trim and Extend commands on the fly. While in either command, holding down the Shift key temporarily switches to the other function:
 Shift key interchange demonstration
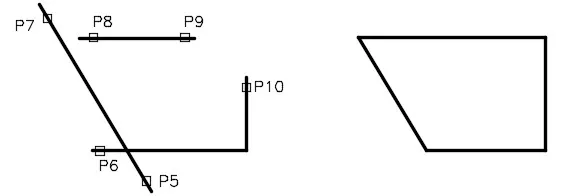 Completed interchange operation
Key Principles for Mastery
Productive Workflow: Draw objects with 100% accuracy in location and direction, but approximate length. Use Trim or Extend to achieve exact final dimensions.
Selection Order: Always select cutting edges first, press Enter, then select objects to modify. This fundamental habit prevents most command errors.
Command Interchangeability: Master the Shift key technique to seamlessly switch between Trim and Extend without exiting the current command.
Edge Setting: Keep the Edge option set to Extend to enable modification even when objects don’t physically intersect.
Construction Technique: Use multiple short construction lines rather than single long lines to create snap points for precise geometry construction.
Conclusion
The Trim and Extend commands represent essential tools in the AutoCAD professional’s arsenal. By mastering these commands and understanding the underlying geometry principles, you can work more efficiently while maintaining the precision required for professional technical drawings. The technique of drawing with approximate lengths but exact directions, then refining with Trim and Extend, enables faster iteration and cleaner final results.
Practice these techniques through the lab exercises included in your coursework, and experiment with the Shift key interchange to develop muscle memory for these fundamental operations. As you become more comfortable with Trim and Extend, you’ll find yourself relying on them for increasingly complex geometry, confident in your ability to achieve exact results efficiently.