Managing a complex workbook often requires more than just entering data into cells; it involves organizing that data into logical sections. Whether you are building a financial report or a simple project tracker, knowing how to manipulate worksheets efficiently is a fundamental skill in Microsoft Excel. By learning how to add new sheets, rename them for clarity, and remove unnecessary tabs, you can keep your spreadsheets professional and easy to navigate.
Managing these elements effectively ensures that your workbook remains scalable as your data grows. In this guide, we will explore the essential steps to master worksheet management using both Ribbon commands and quick shortcuts.
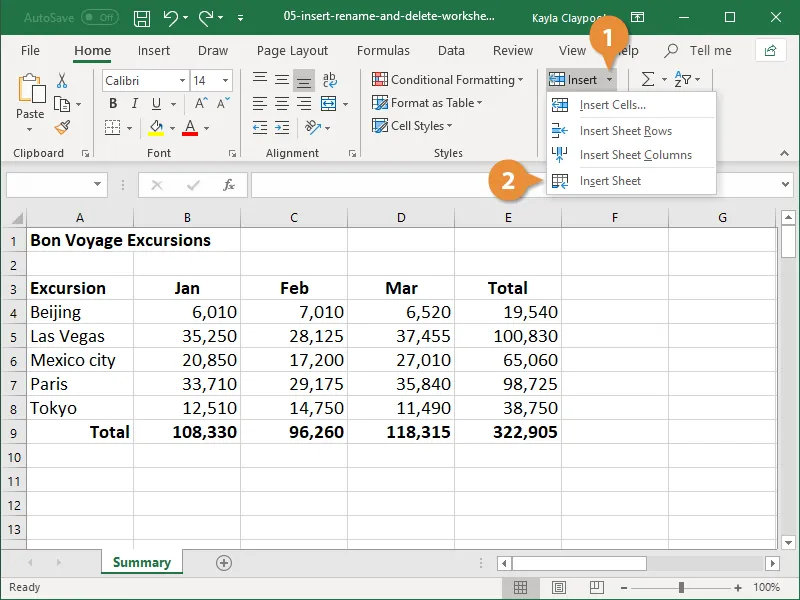
Inserting a New Worksheet
When your current sheet becomes cluttered or when you need to separate different types of data—such as monthly sales from annual projections—adding a new worksheet is the best solution. Excel provides multiple ways to expand your workbook.
To insert a worksheet using the Ribbon:
- Navigate to the Home tab on the top menu.
- Locate the Cells group and click the Insert button list arrow.
- Select Insert Sheet from the dropdown menu.
Alternatively, for a faster approach, you can simply click the New Sheet button (the plus icon) located at the bottom of the workbook window, right next to your last existing sheet tab. This immediately generates a blank worksheet for use.
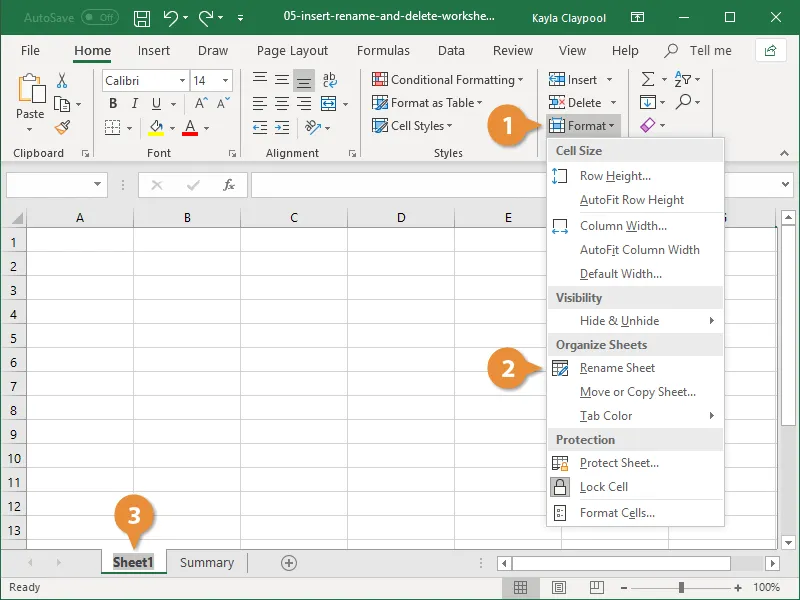
Renaming Worksheets for Better Organization
By default, Excel assigns generic names like “Sheet1” or “Sheet2.” While functional, these names do not help you identify the content of the sheet at a glance. Renaming your tabs is a crucial step in maintaining an organized file, especially when sharing the document with others.
To rename a worksheet:
- Go to the Home tab and click the Format button.
- Choose Rename Sheet from the list.
- Once the tab name is highlighted, type the new descriptive name.
- Press Enter to save the changes.
A professional tip: You can also double-click the sheet tab at the bottom of the screen to quickly enter the rename mode without navigating through the Ribbon menus.
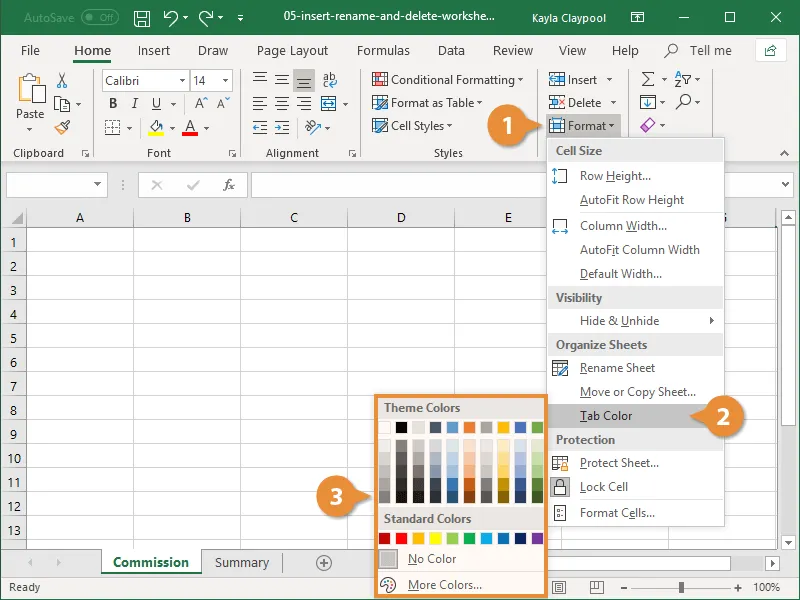
Customizing Tab Colors
To further enhance the visual organization of your workbook, Excel allows you to change the color of worksheet tabs. This is particularly helpful for grouping related sheets together—for example, making all “Expense” sheets red and all “Income” sheets green.
To change the tab color:
- Click the Format button on the Home tab.
- Hover over Tab Color to view the palette.
- Select the desired color from the theme or standard colors.
If you prefer a mouse-driven shortcut, you can right-click any sheet tab and select Tab Color directly from the context menu. This small visual cue can significantly speed up your workflow when jumping between numerous tabs.
How to Delete a Worksheet Safely
When a worksheet is no longer needed, it is best to remove it to keep your file size optimized and your workspace clean. However, use caution: deleting a sheet is a permanent action that cannot be undone using the “Undo” command if the sheet contains data.
To delete a worksheet:
- Select the tab you wish to remove.
- Click the Delete list arrow on the Home tab.
- Select Delete Sheet.
- If the sheet contains data, a confirmation dialog will appear. Click Delete to confirm.
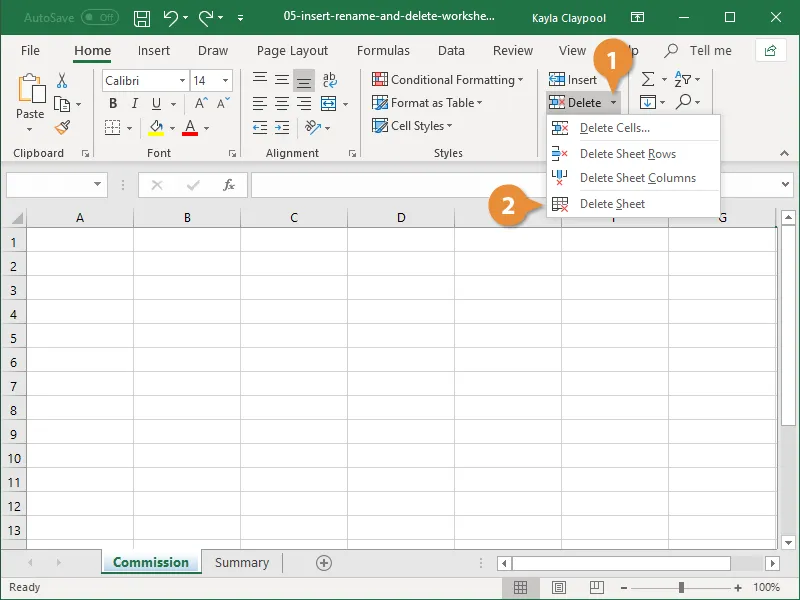 The Delete menu in the Home tab highlighting the Delete Sheet option
For a quicker method, right-click the sheet tab you want to get rid of and choose Delete from the menu. Always double-check that you have selected the correct tab before finalizing this step to avoid losing important information.
Conclusion
Mastering the basics of worksheet management—inserting, renaming, coloring, and deleting—is vital for any Excel user aiming for efficiency. By applying these simple techniques, you transform a messy collection of data into a structured, professional-grade workbook. Start organizing your tabs today to make your data more accessible and your spreadsheets easier to manage.