Introduction
Creating a powerful yet portable gaming and media server is a unique challenge, especially for enthusiasts seeking to balance mobility with high-performance components. In this guide, we’ll explore how to construct a compact server that accommodates modern GPUs, supports virtual machines, and handles noise efficiently—all while staying within practical space constraints. This step-by-step overview is perfect for PC and mobile gamers interested in building a versatile setup.
Choosing the Right Server Chassis
When moving frequently, the first consideration is portability. Standard servers often exceed the depth required for travel racks, which are designed for audio gear rather than large server hardware. The ideal chassis must:
- Fit within a 19″ travel rack
- Support a full-sized GPU
- Provide sufficient power (minimum 500W)
- Be obtainable from used equipment vendors like eBay
By narrowing down options based on these criteria, you can ensure both performance and portability.
Powering the GPU
One of the trickiest aspects is supplying reliable power to a high-performance GPU. In compact 2U server chassis, GPUs often need to be mounted sideways, with rear-facing power connectors to avoid interference.
Power Supply Considerations
A standard ATX or server power supply may lack the correct PCIe connectors. Here’s a typical setup:
- 24-pin ATX connector
- Dual 8-pin EPS +12V
- Peripheral 4-pin power cables
- PCIe 8-pin requirement for GPU
Even if a PSU is rated for sufficient wattage, compatibility with GPU connectors is crucial. Custom adapters, such as combining Molex and EPS connectors into a single 8-pin PCIe cable, can solve this problem.
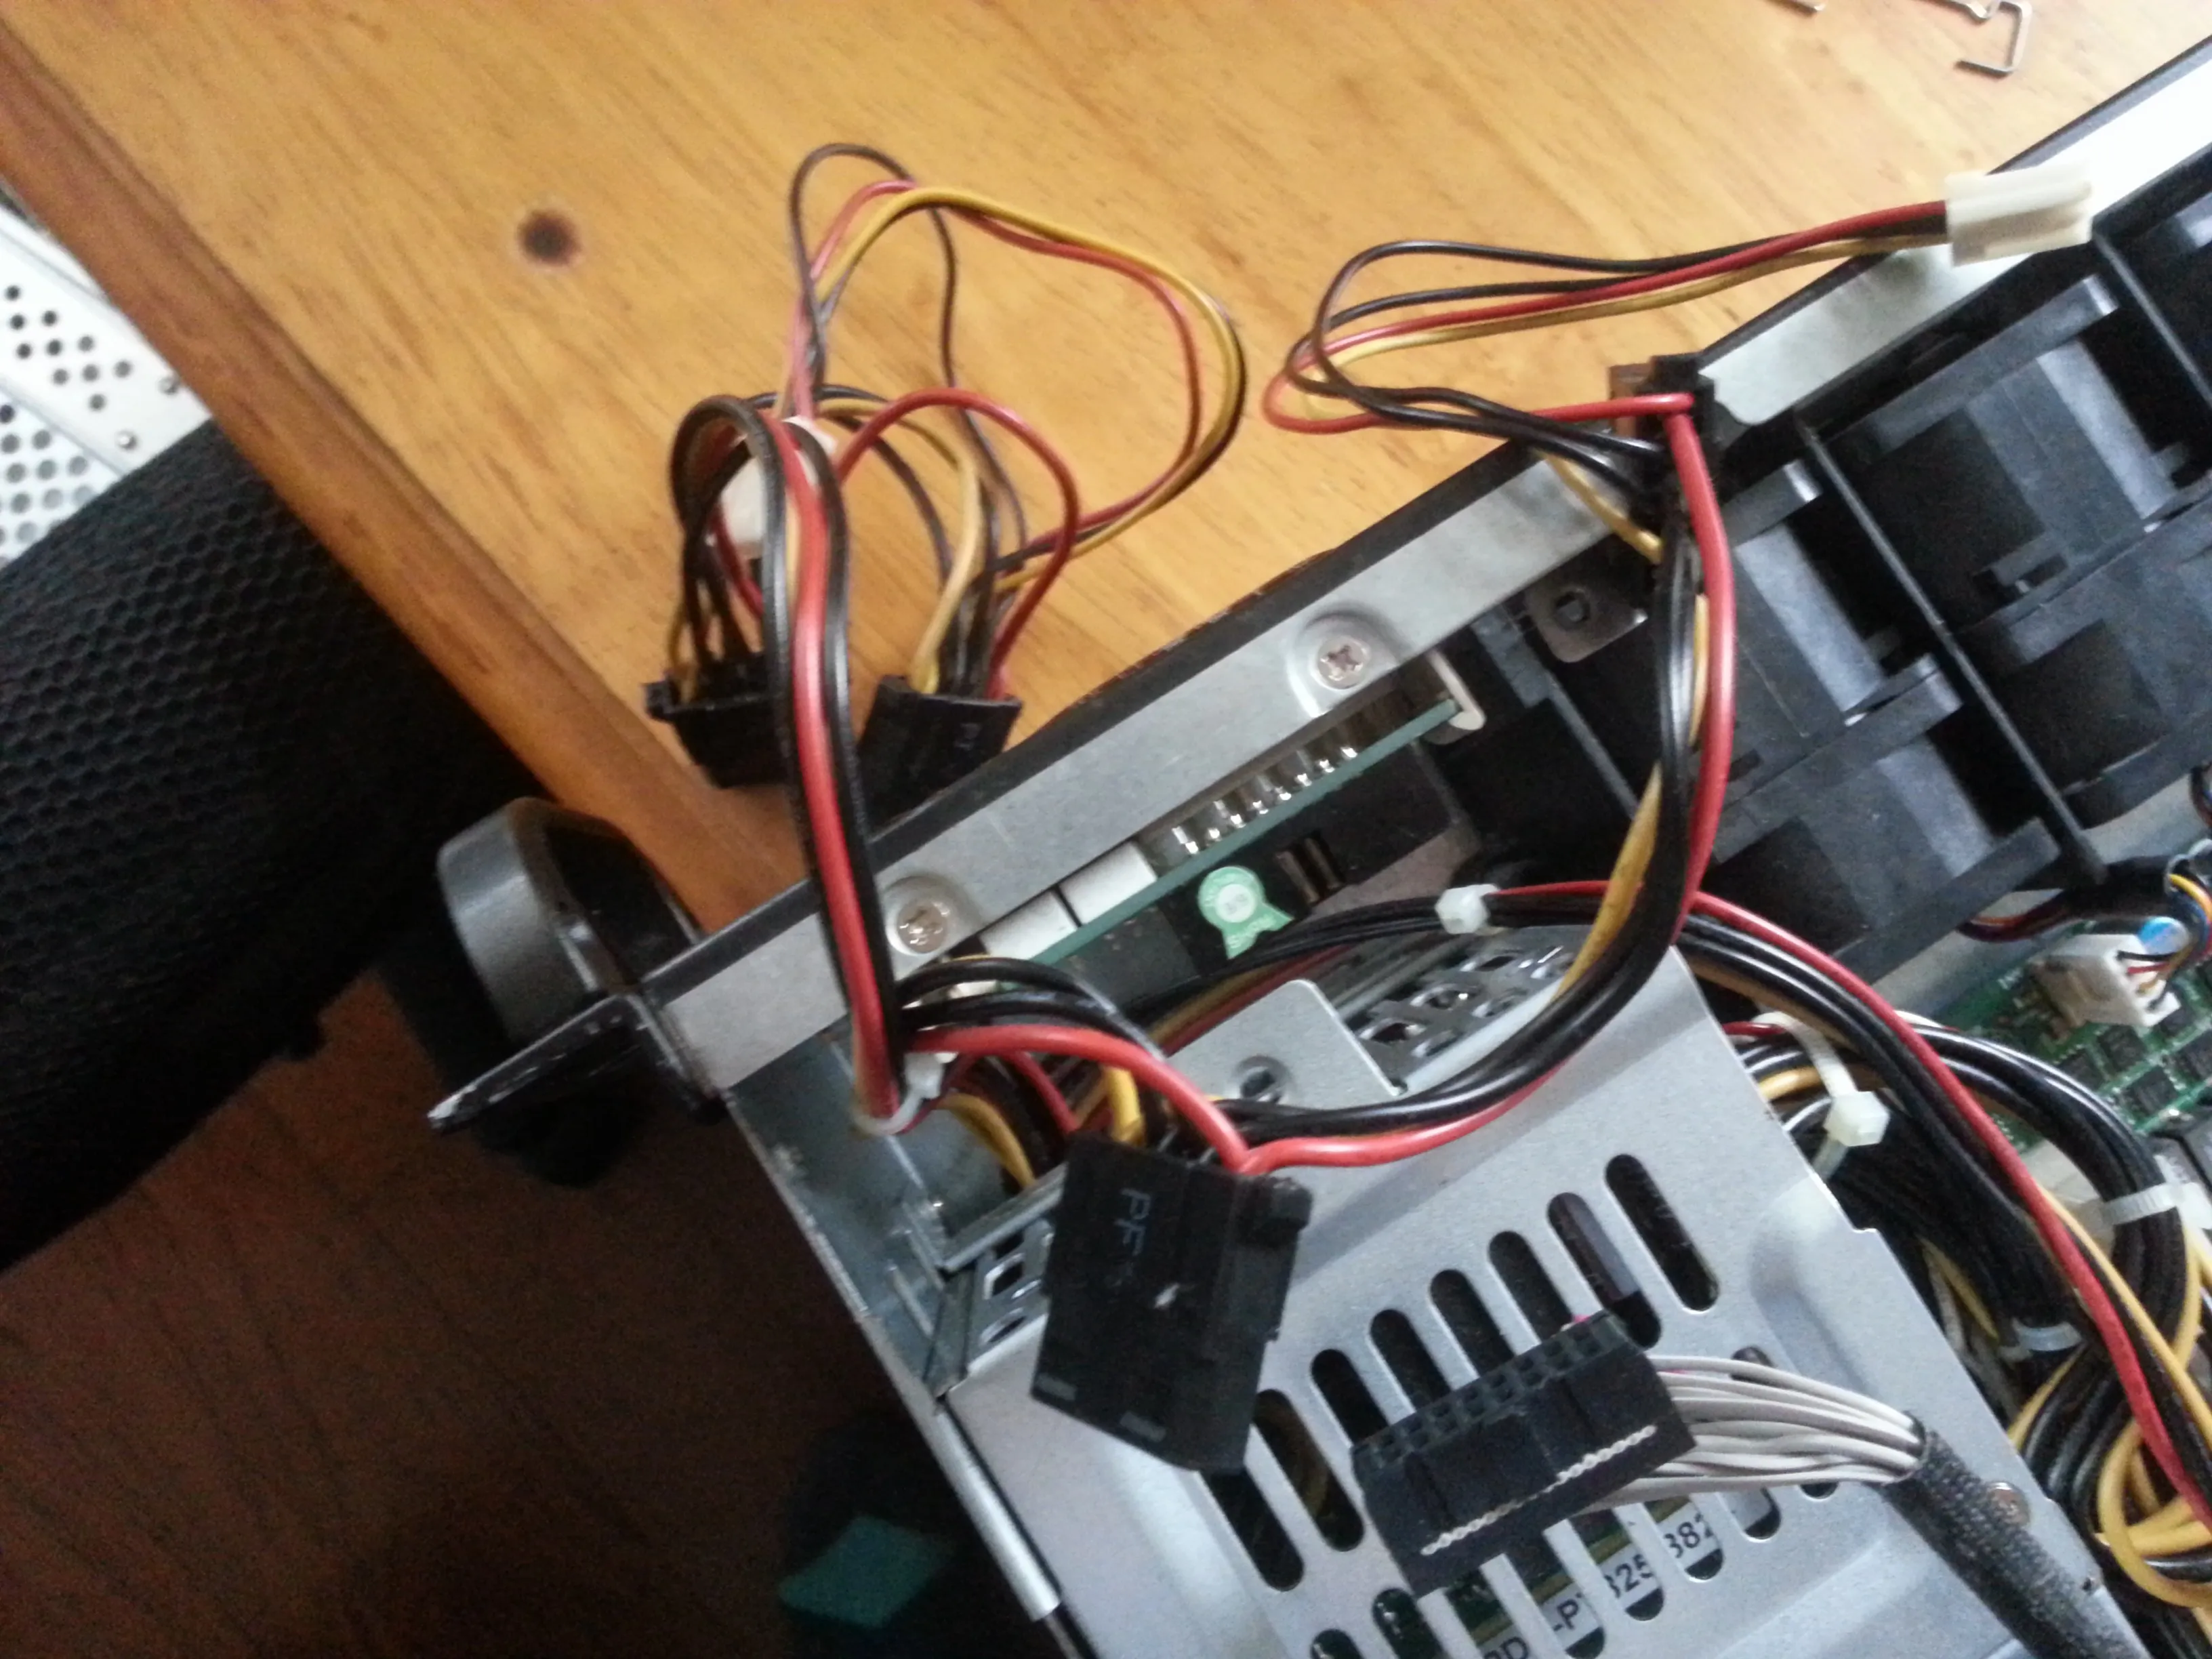
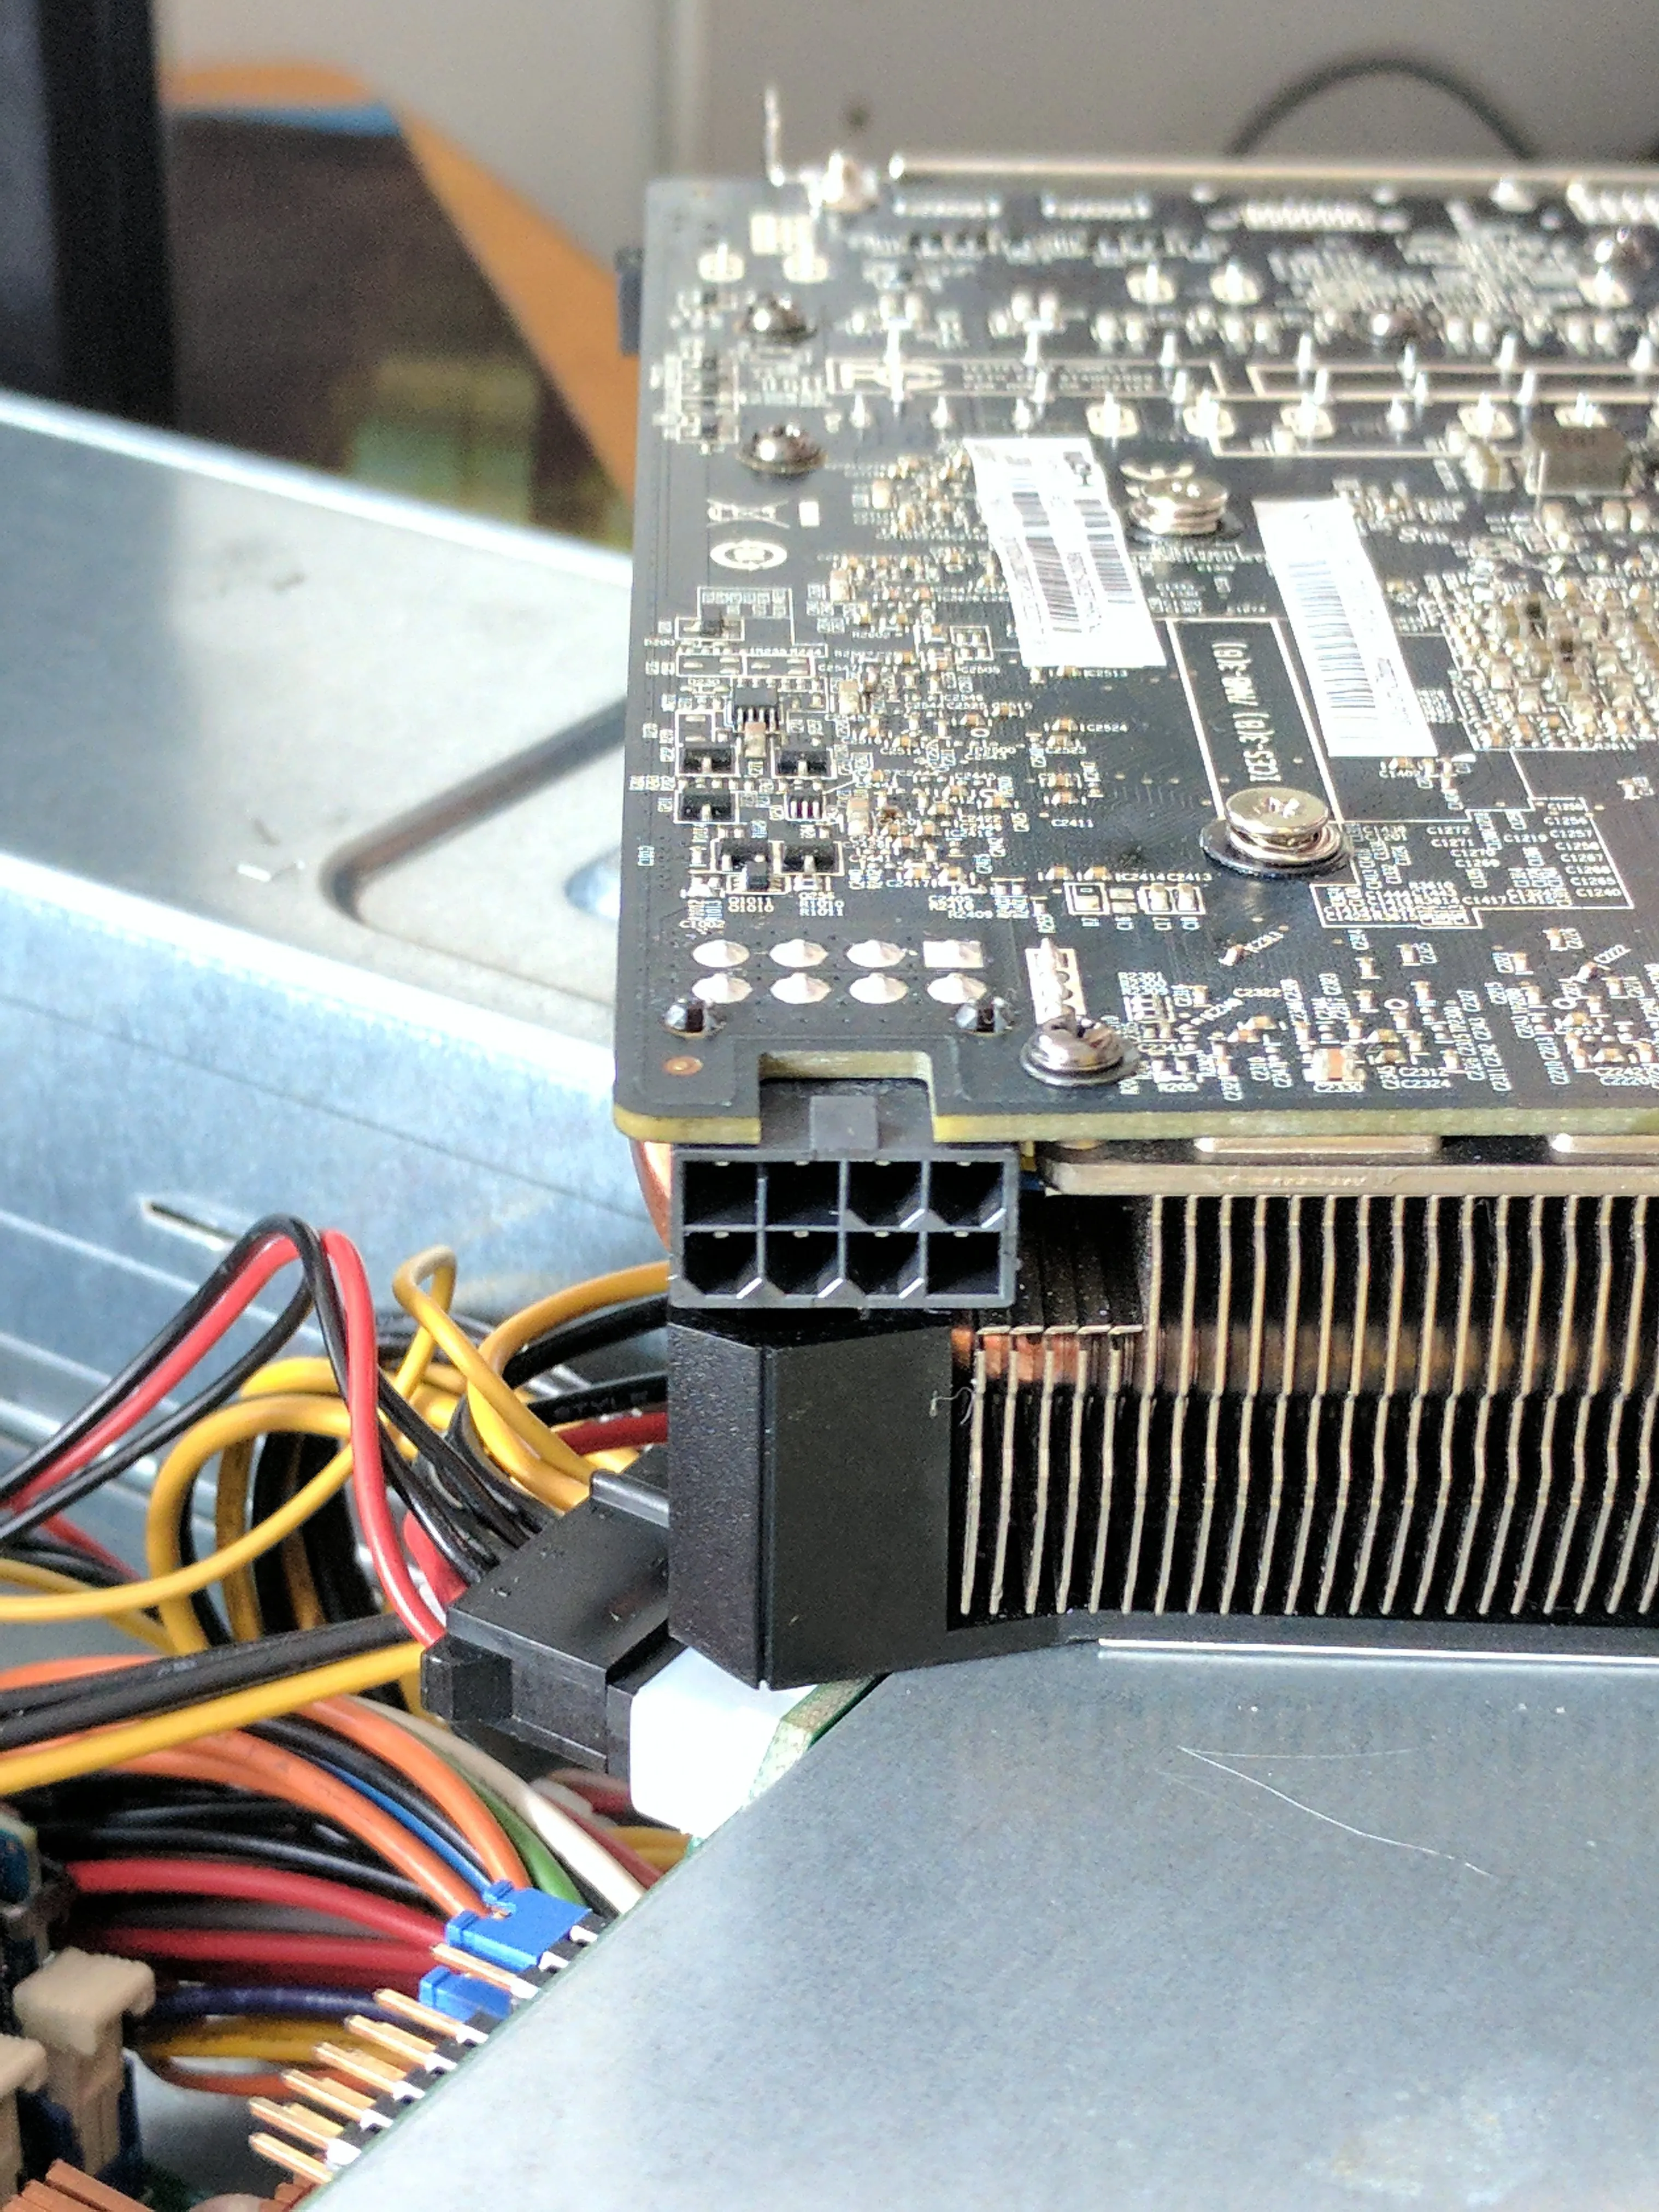 Custom 8-pin PCIe connector for GPU
Server power supplies use proprietary configurations, so calculating total available current is essential. For instance, a single 12V rail rated at 58A can provide 464W after accounting for CPU and motherboard consumption—enough for a 225W GPU plus additional components.
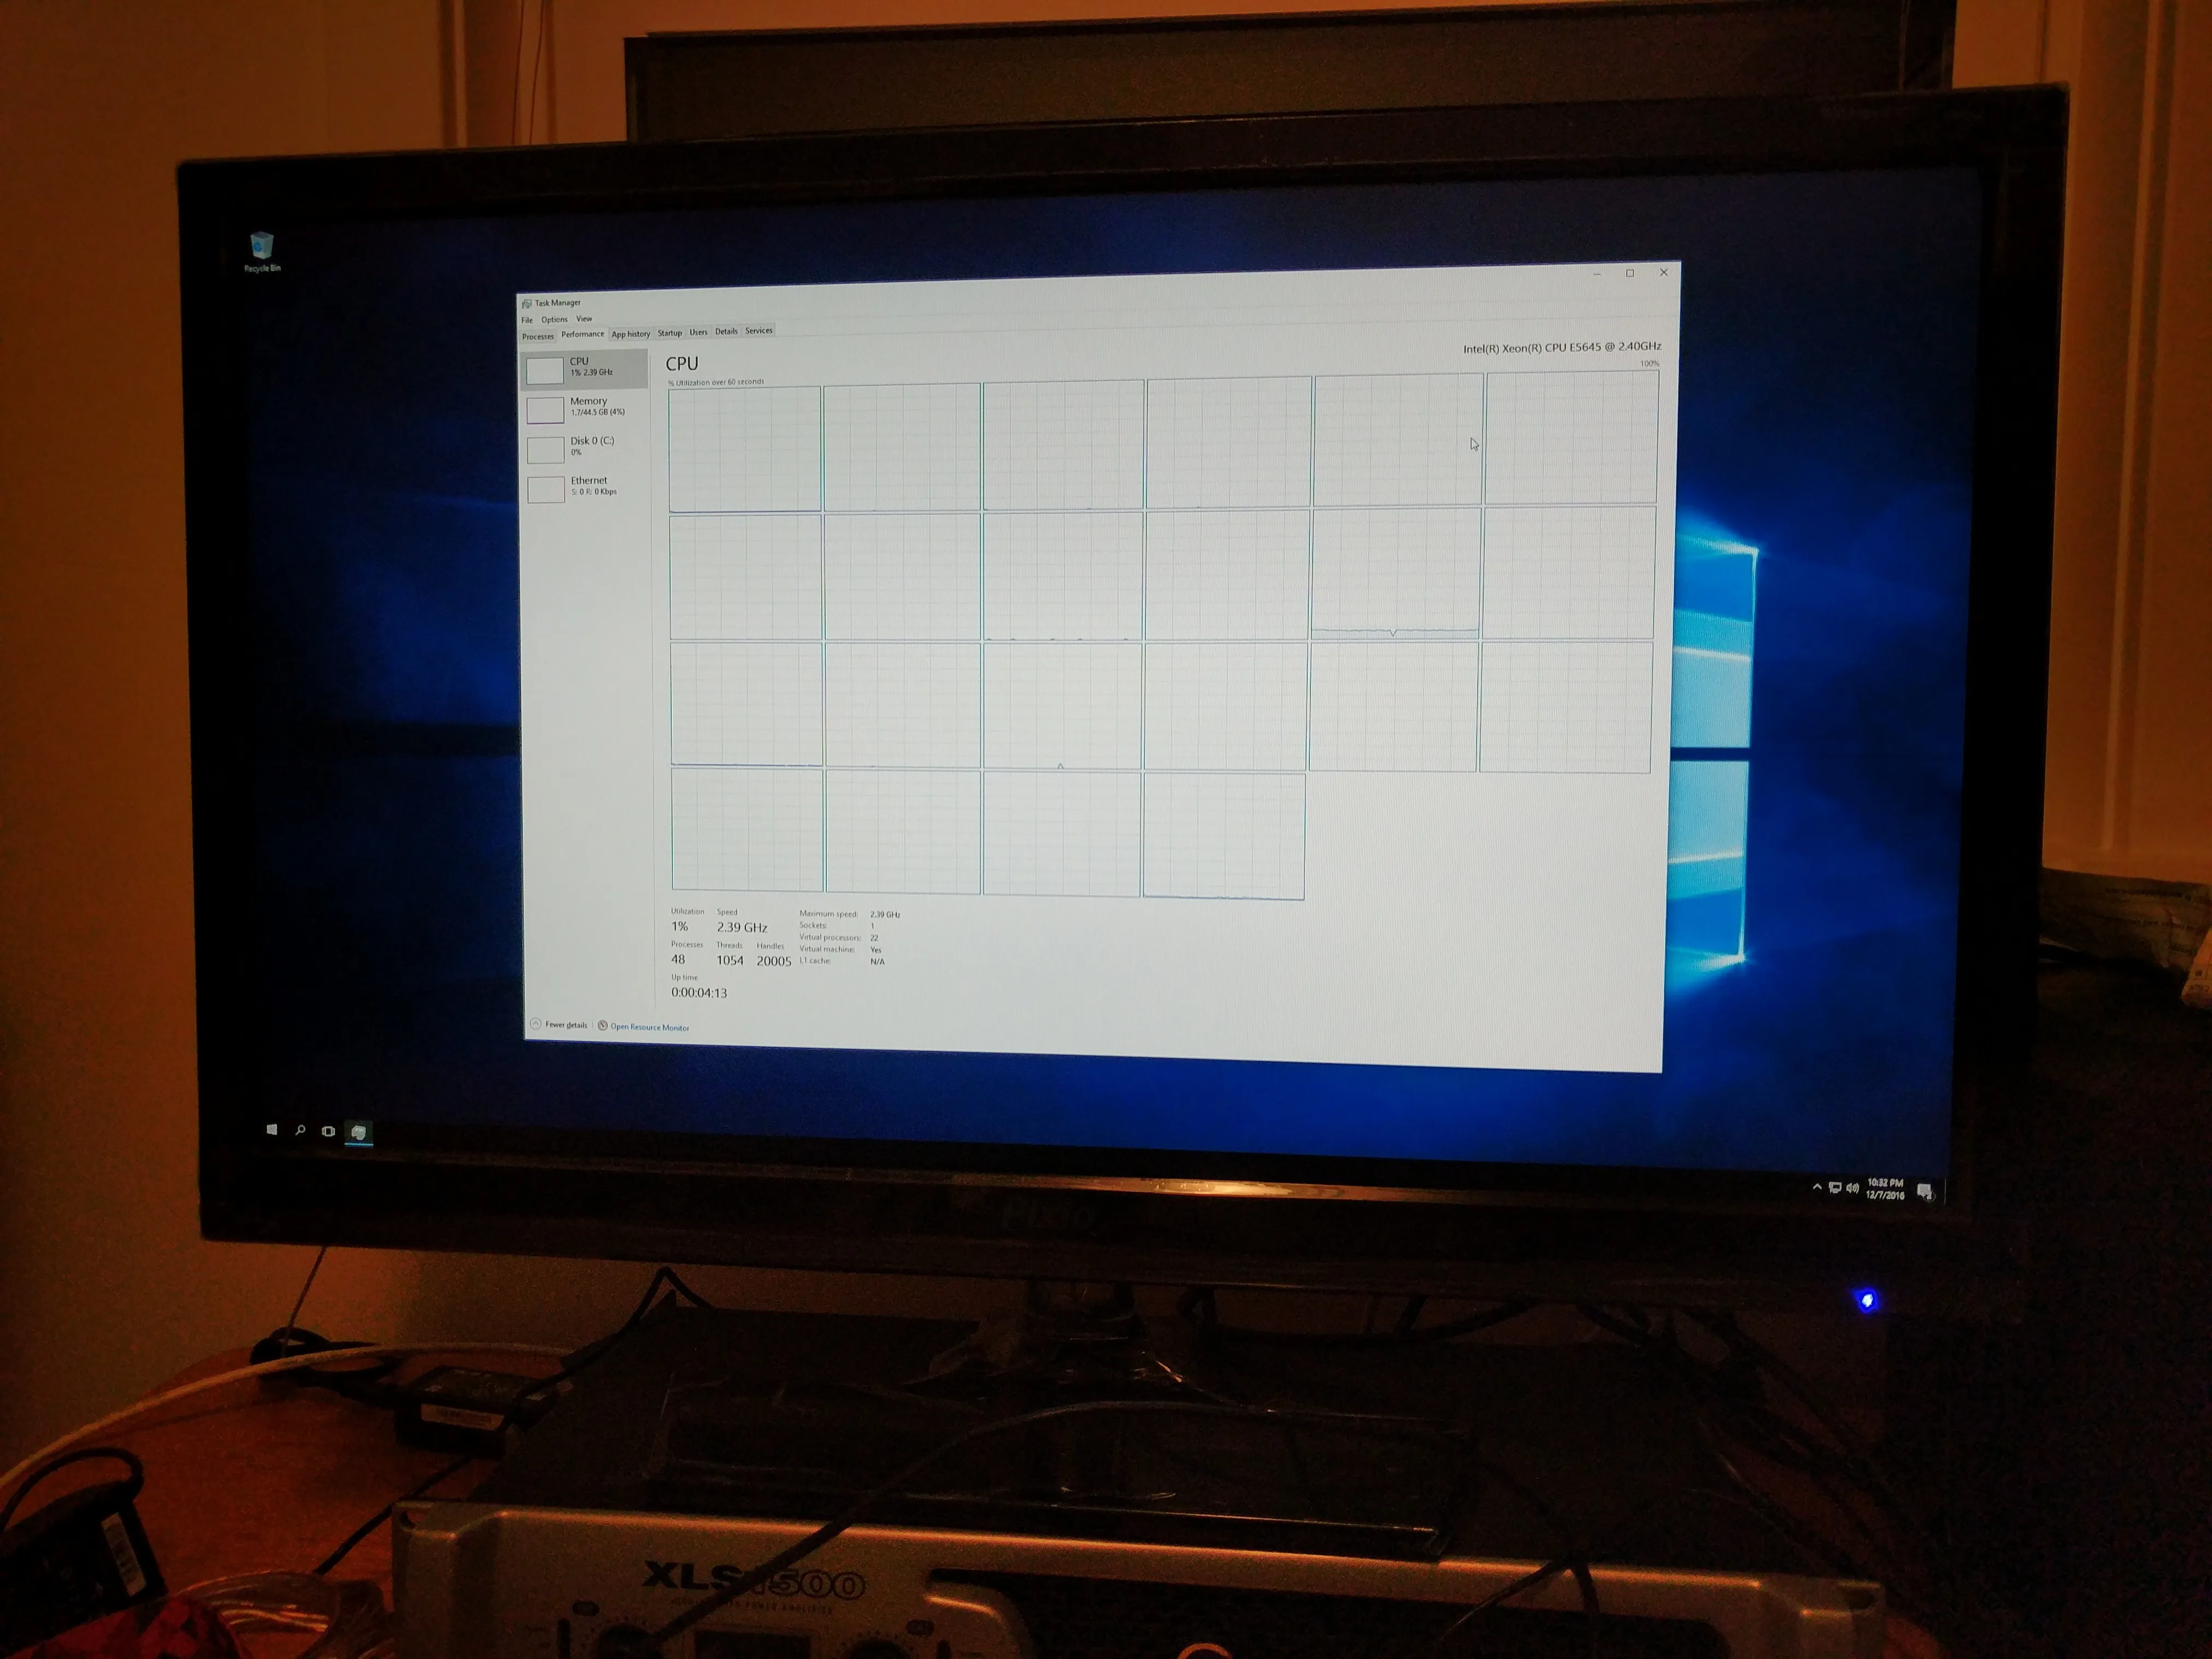
Installing a Hypervisor
With the hardware ready, the next step is to install a hypervisor. Virtual machines allow separation of applications and efficient resource allocation. Popular choices include:
- Unraid: Tailored for gaming PCs and media servers
- VMware ESXi and Proxmox: Advanced options for enterprise setups
Passing through the GPU to a Windows VM enables high-performance gaming on a virtualized system.
Mounting the GPU
Sideways GPU mounting requires precision and custom support. Commercial right-angle PCIe adapters are available, but for a tailored solution, 3D printing can create strong, low-profile mounts. Key points include:
- Measuring motherboard mount points and adapter position
- Designing CAD models with angled supports for minimal airflow restriction
- Printing with heated chambers to prevent warping
 3D-printed support structure for right-angle GPU mount
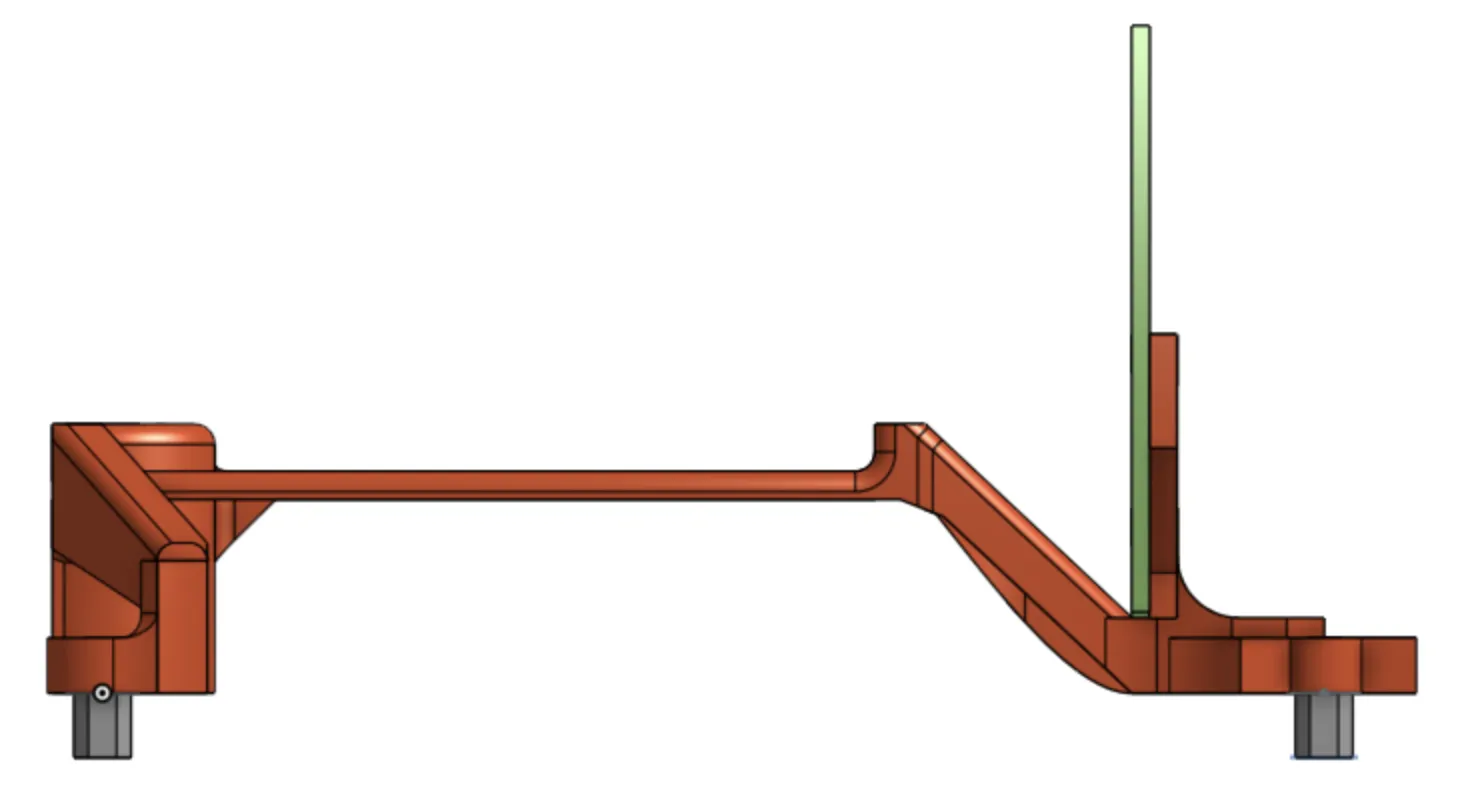
Reducing Noise
Noise is a common issue in compact servers. Solutions include:
- Relocating the server to a separate area and using Steam Link for gaming
- Constructing wooden racks with air baffles modeled after industrial noise suppression systems
- Using CAD to plan baffle design for optimal airflow while reducing sound transmission
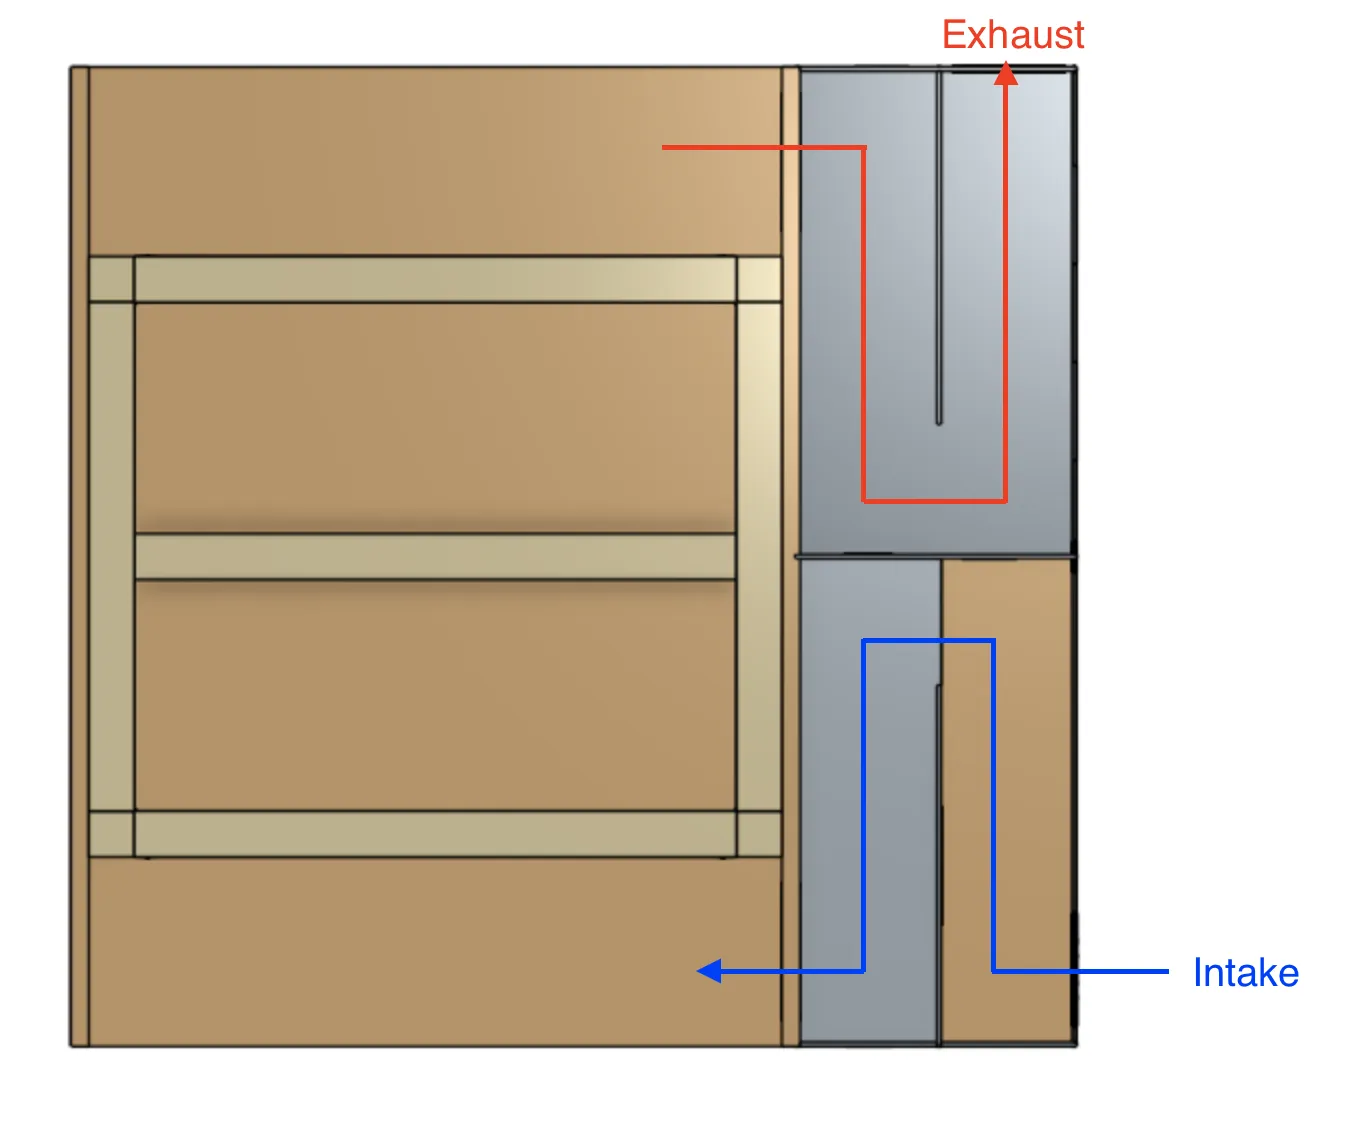 Zig-zag air baffle for sound suppression
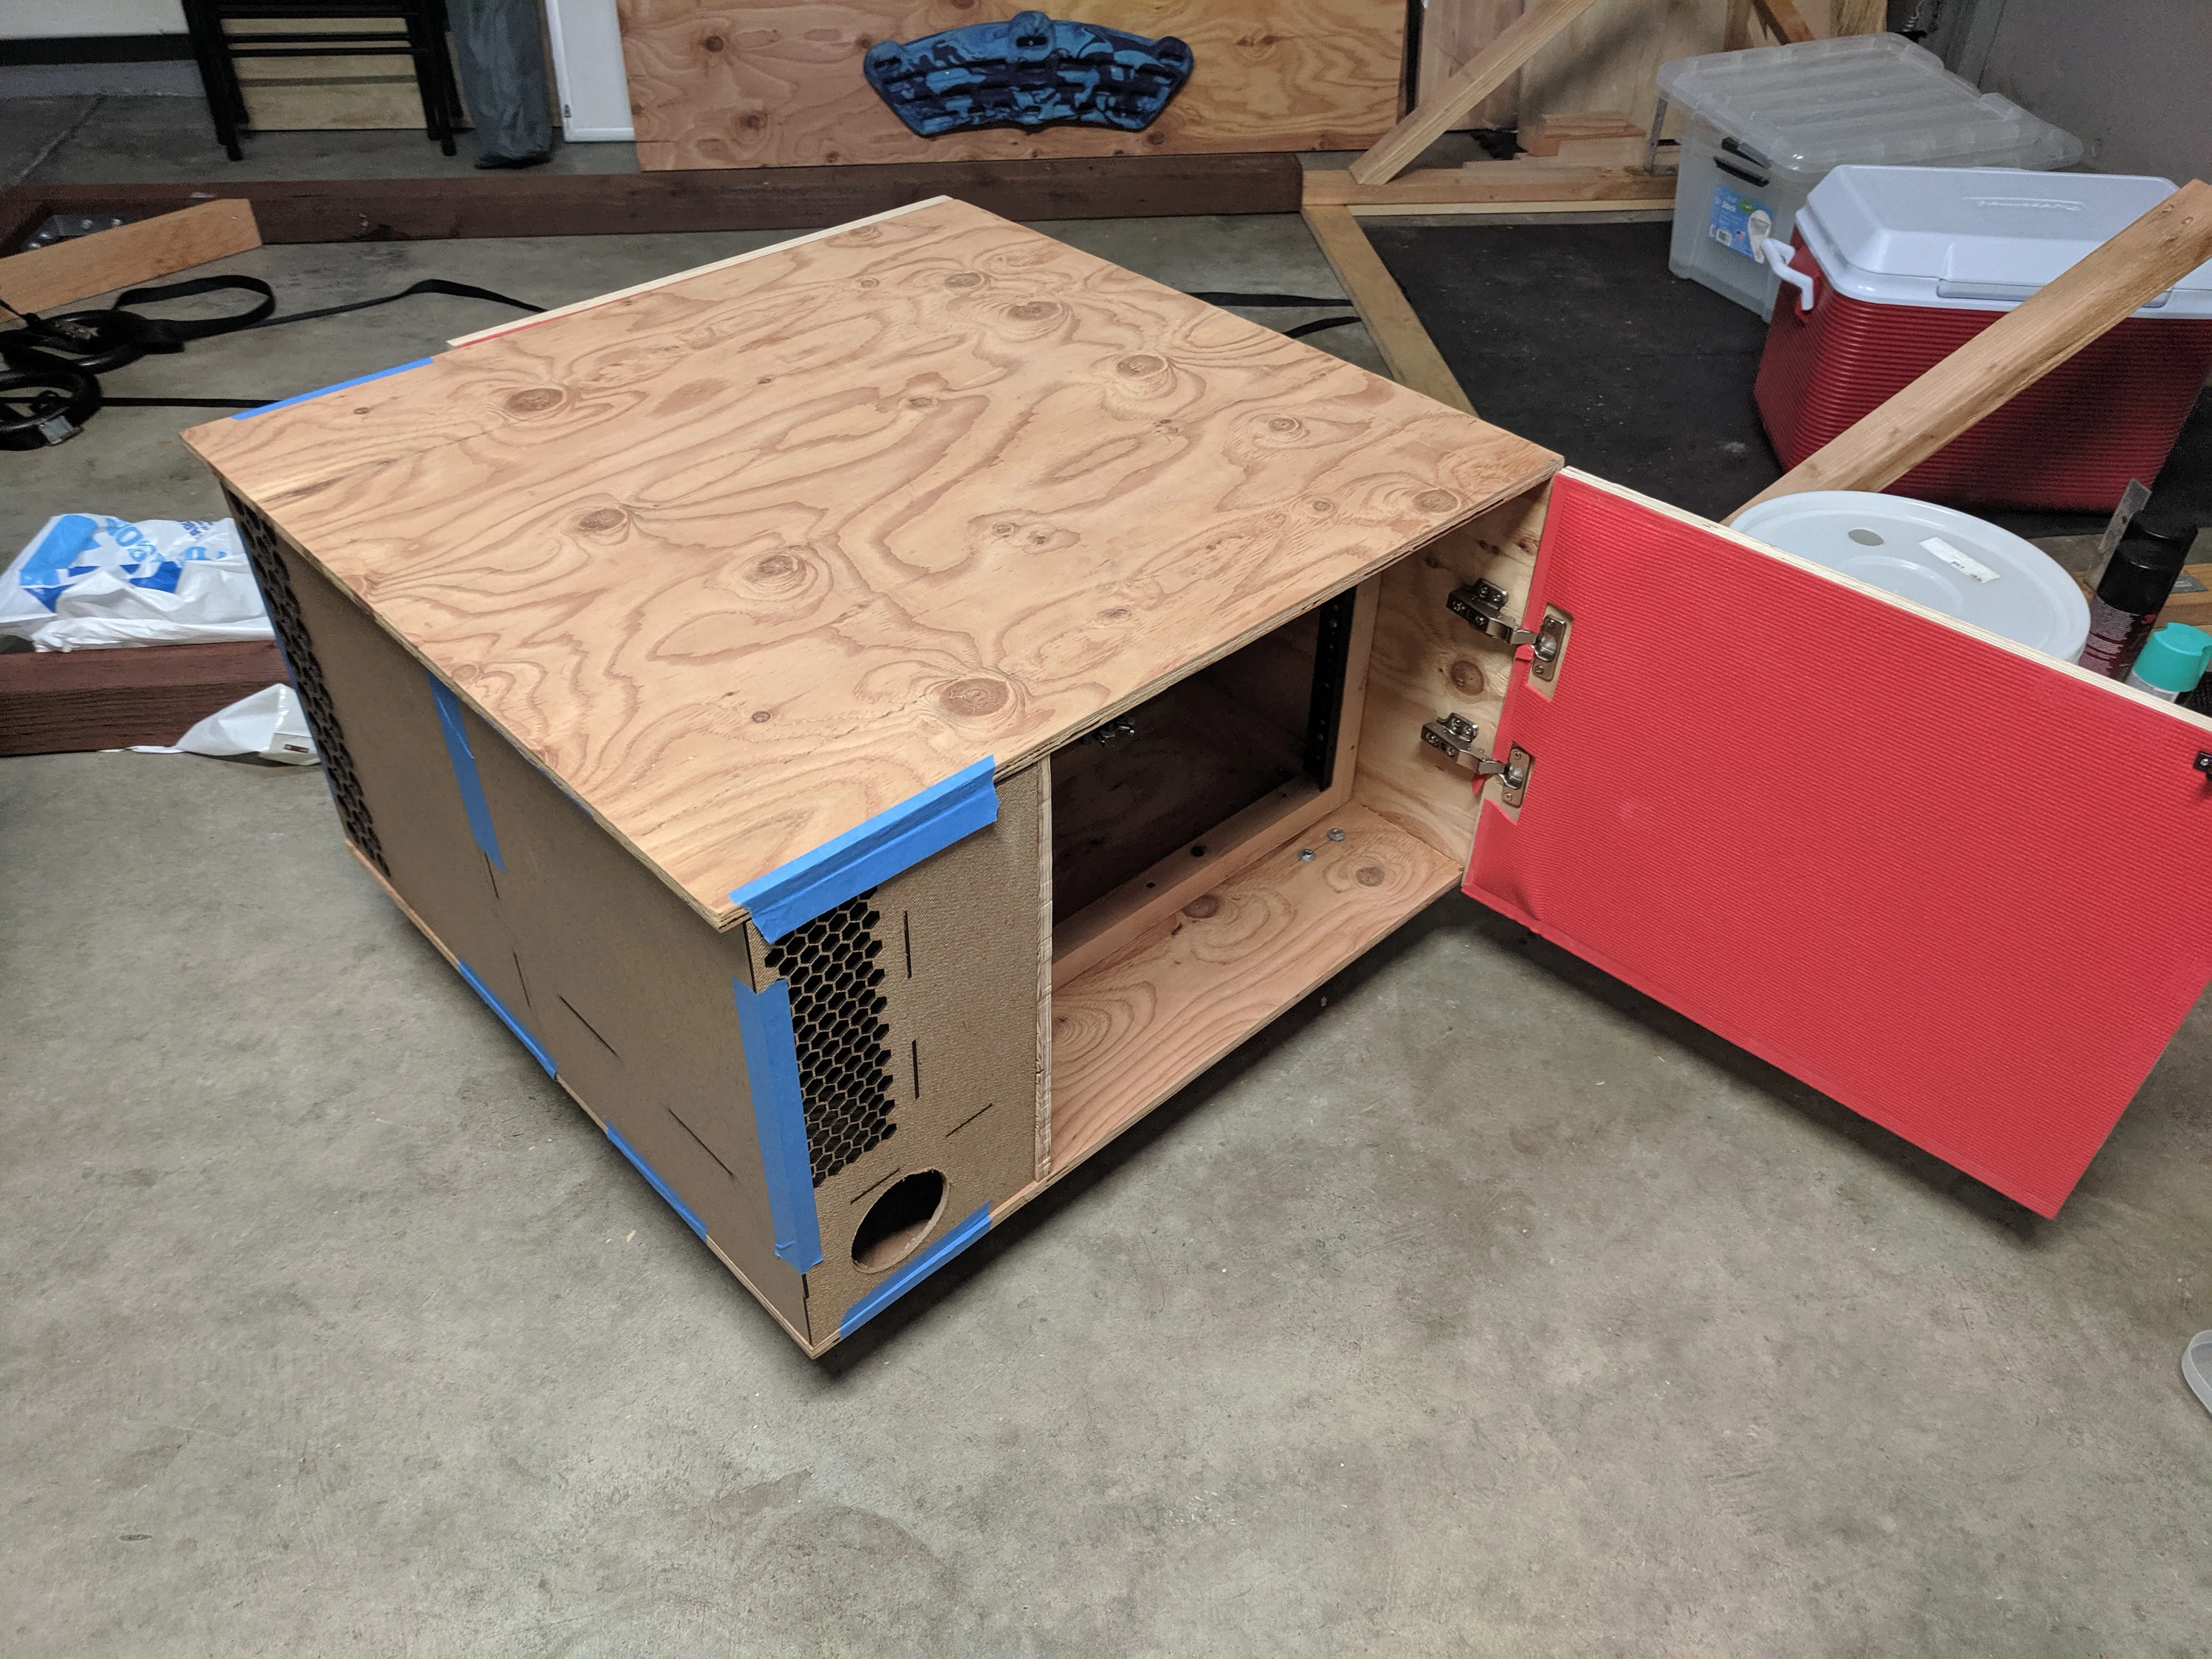
Lessons Learned
Successes
- Sideways GPU mounting proved fast, efficient, and thermally safe
- Custom Molex cables allowed neat internal cable management
Future Improvements
- Consider smaller, lighter chassis for portability
- Opt for inherently quiet fans to minimize the need for bulky baffles
Conclusion
Building a compact, portable gaming and media server is both challenging and rewarding. By carefully selecting components, customizing power solutions, and addressing noise, you can create a versatile system suitable for high-performance gaming and virtualized environments. This approach balances mobility with power, offering a practical blueprint for enthusiasts seeking a DIY server solution.
Ready to build your own? Explore used server parts on eBay, experiment with custom mounts, and start virtualizing your gaming experience today.