The “Graphics Card Bolster” is an innovative accessory designed to provide comprehensive protection for your motherboard and graphics card from potential damage caused by the weight of the GPU. This guide will walk you through its components, installation, and adjustment process, ensuring optimal support for your valuable PC hardware.
Understanding the Graphics Card Bolster
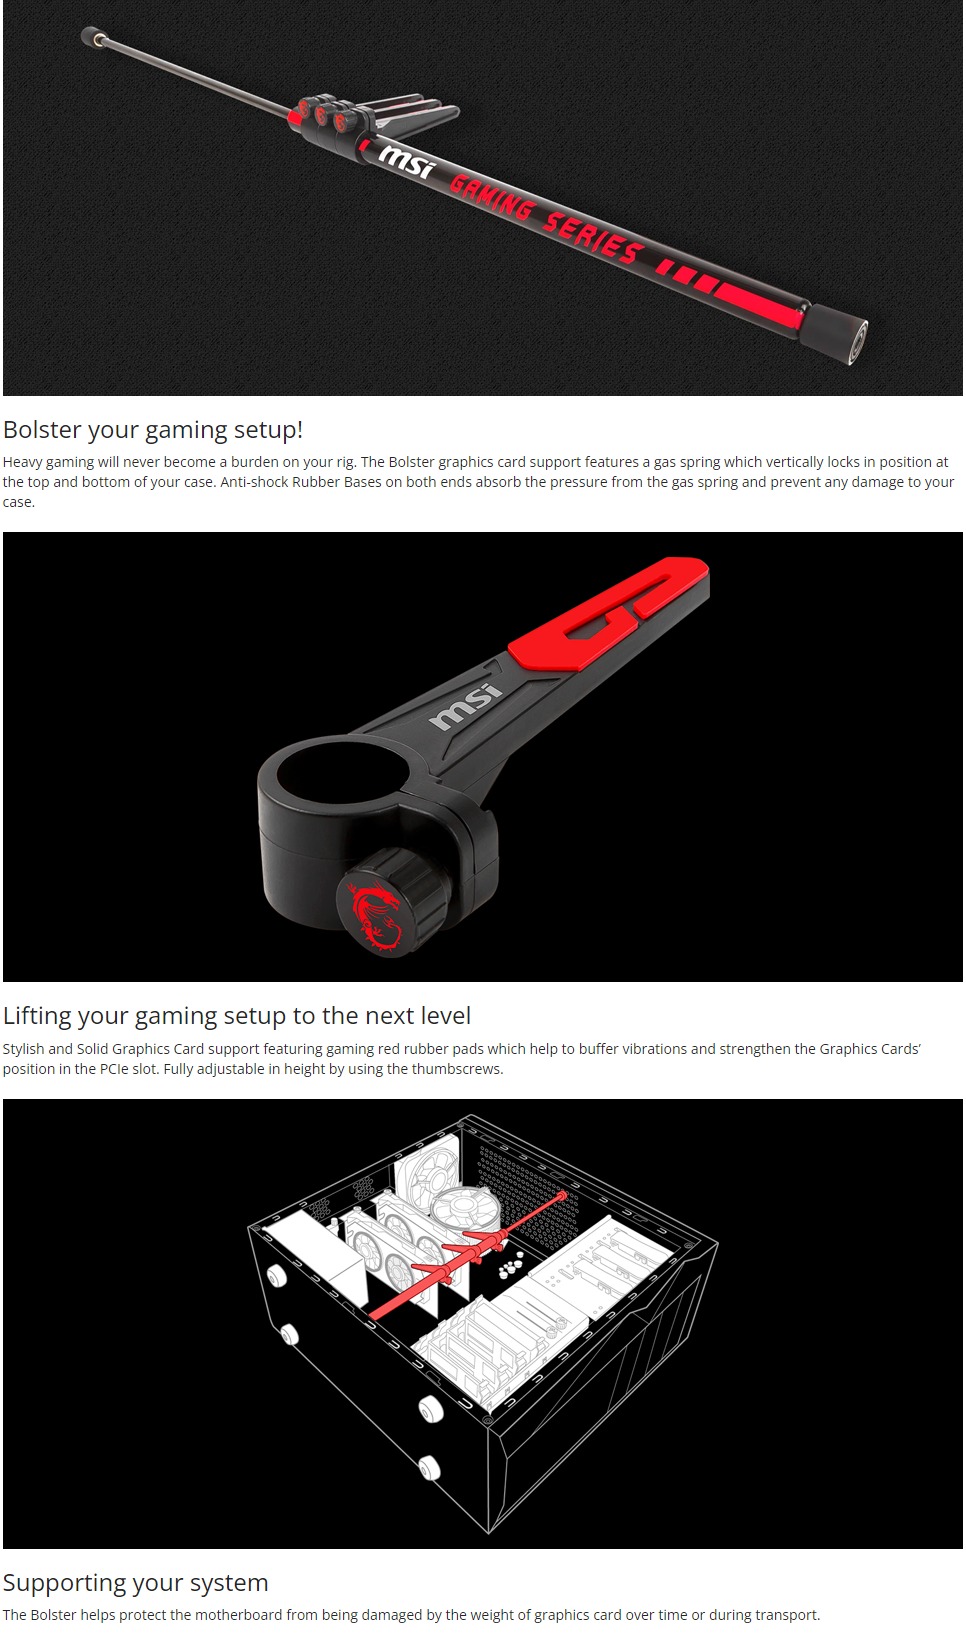
This specialized support system is engineered with user-friendly features to safeguard your PC’s internal components. Its core design centers around a gas spring mechanism, complemented by anti-shock rubber bases and solid plastic holders with protective pads. The primary goal is to alleviate the stress on your motherboard, which can occur over time due to the sheer weight of modern, often bulky, graphics cards. This proactive approach helps prevent sagging and potential damage, extending the lifespan of your hardware.
Key Components
The Graphics Card Bolster package includes:
- Gas Spring: The primary component responsible for providing vertical support.
- Rubber Bases: Two black rubber bases designed to absorb pressure and prevent scratches on your PC case.
- Horizontal Supports: Three black horizontal supports that can be adjusted to make contact with your graphics card or CPU heat sink.
- Manual: An instruction manual to guide you through the installation process.
Installation Guide
Installing the Graphics Card Bolster is a straightforward process designed for PC enthusiasts of all levels.
Step 1: Prepare the Supports
Begin by loosening the screw sets on the horizontal supports. Carefully slide these supports onto the gas spring. Once positioned, screw the rubber bases onto both ends of the gas spring.
Step 2: Install into Your PC Case
For optimal ease of installation, it is recommended to lay your PC case on its side. Gently push both ends of the gas spring inward, allowing you to position it between the top and bottom of your case. Once placed, release the pressure, and the ends of the gas spring will naturally extend to connect with the case’s interior surfaces.
Step 3: Secure the Supports
With the gas spring in place, adjust the horizontal supports so they gently touch the bottom of your graphics card(s) or CPU heat sink. It is crucial to ensure these supports do not interfere with any moving parts, such as fans. After making the necessary adjustments, tighten the screws on the horizontal supports to secure them firmly in position.
Testing and Adjustment
After completing the installation, return your PC case to its upright position. Carefully check if the CPU heat sink and graphics card(s) are adequately supported. If you are satisfied with the stability, you can proceed to close your PC case. Should you find that further adjustments are needed, do not hesitate to repeat the installation and adjustment steps (Process C and D) until the desired level of support is achieved. This ensures your graphics card is properly stabilized, mitigating the risk of hardware damage.