AutoCAD’s Annotative scaling feature introduces a powerful new dimension to managing drawing elements across different scales. While it might take some time to fully grasp its capabilities, the Annotative hatching functionality is particularly straightforward to master and can significantly streamline your workflow. This guide will walk you through understanding and utilizing annotative hatches to save time and effort.
Historically, managing hatches across various scales in AutoCAD presented a considerable challenge. The “old school” method involved placing hatches on separate layers, which then needed to be individually frozen or thawed in different viewports to display correctly. If you desired the same geometry to be hatched in multiple views but scaled appropriately for each, you’d typically require duplicate layers for each hatch, further complicating the process.
The advent of Annotative scaling revolutionizes this. With annotative hatches, you can embed scaling information directly into the hatch object itself. This means a hatch with a 1:1 scale attached will only appear in viewports set to that scale. More powerfully, an annotative hatch configured for both 1:1 and 1:10 scales will automatically display and scale correctly in viewports of both those scales, eliminating the need for manual layer management.
Understanding AutoCAD’s Annotation Controls
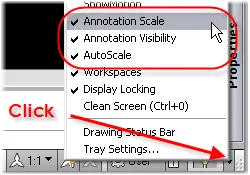
Before diving into creating annotative hatches, it’s crucial to familiarize yourself with the relevant controls in AutoCAD’s status bar. Ensure that annotation-related tools are visible by clicking the customization arrow (usually at the far right of the status bar) and selecting the appropriate options.
Setting Up Your Scale List
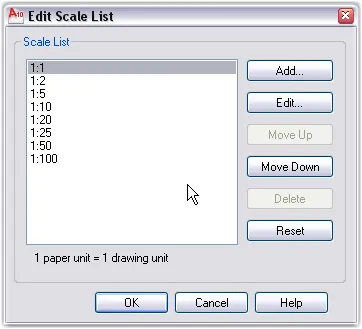
The “Annotation Scale” tool on the status bar is your primary control. It allows you to set the current annotation scale and, importantly, to manage the list of available scales for your drawing. To customize this list, select “Custom” from the Annotation Scale dropdown. This opens the “Edit Scale List” dialog box, where you can add or remove scales to suit your project’s needs. It’s highly recommended to configure this scale list within your template file to ensure consistency across all new drawings.
Creating an Annotative Hatch
Begin by noting the current value of the “Annotation Scale” tool in your status bar. It’s generally advisable to keep this at 1:1, as it serves as the base multiplier for other scales.
Proceed to create your hatch as you normally would, setting the desired Type, Angle, and Scale. Before finalizing, locate the “Annotative” checkbox within the hatch options and ensure it is selected.
Upon confirming the hatch, you’ll notice a new glyph appear near your cursor when hovering over the object, indicating that it is annotative. This glyph visually represents a scale rule seen from one end.
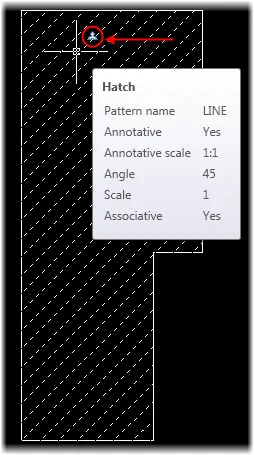
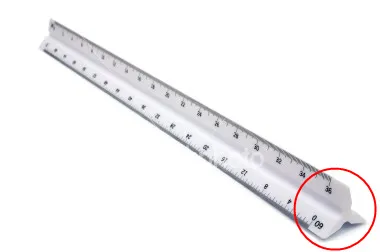 A Scale rule seen from one end
At this stage, the hatch is associated with the current annotation scale (e.g., 1:1) from when it was created. This means it will only be visible in viewports set to that specific scale, without requiring a new layer.
Adding Multiple Annotative Scales to Your Hatch
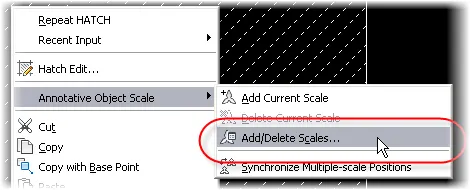
To make your hatch appear and scale correctly in multiple viewports, you need to add additional scales to its properties. Select the hatch, right-click, and navigate to “Annotative Object Scale” > “Add/Delete Scales…”. Alternatively, you can type OBJECTSCALE at the command line and select the hatch.
This action opens the “Annotation Object Scale” dialog box. Initially, only the scale present during creation (e.g., 1:1) will be listed. Click “Add” to incorporate more scales.
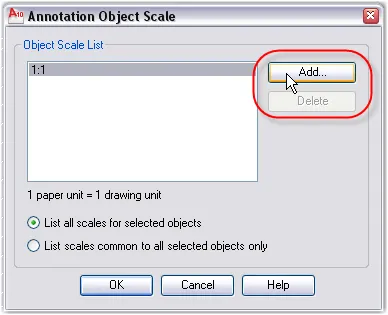 AutoCAD's Annotation Object Scale List
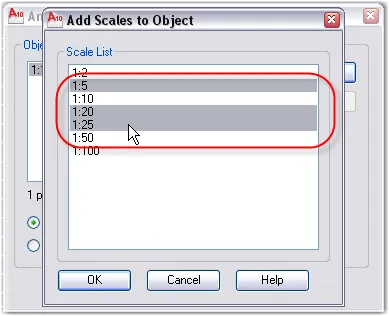
The available scales are drawn from the list you previously configured using the “Edit Scale” command. You can select multiple scales using CTRL+click or SHIFT+click.
Once you’ve added the desired scales, the glyph near your hatch will change to indicate that it now supports multiple annotation scales.
Visualizing Annotative Hatching in Action
To observe the effect of your changes, ensure that the “Annotation visibility” setting on the status bar is toggled to “Show current scale only.” This icon typically resembles a scale rule with a light bulb.
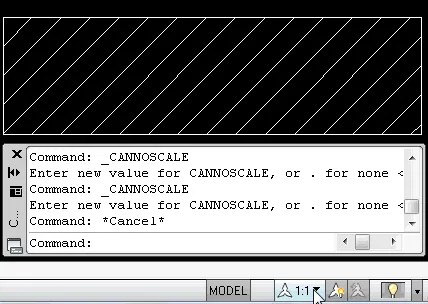
Now, experiment by changing the current annotation scale using the “Annotation scale” tool. As you cycle through different scales, you will see your annotative hatch appear, disappear, or rescale itself automatically, adhering to the scales you’ve assigned.
 Annotative Hatching
Annotative Hatches in Paper Space Viewports
Switching to Paper Space and creating a viewport reveals similar annotative controls on the status bar, though they may appear slightly different. The core principle remains the same: select the viewport and use its dedicated scale tool to set the desired viewport scale. Your annotative hatches will then magically adjust to fit the viewport’s scale accordingly. Remember, these annotative tools in Paper Space are only visible when a viewport is actively selected.
Implementing annotative hatches is a straightforward process that offers significant benefits in managing complex drawings across multiple scales. Trying out annotative hatches today can undoubtedly enhance your efficiency in AutoCAD.
For those interested in more advanced hatching techniques, consider exploring how to create an AutoCAD hatch using curved lines.